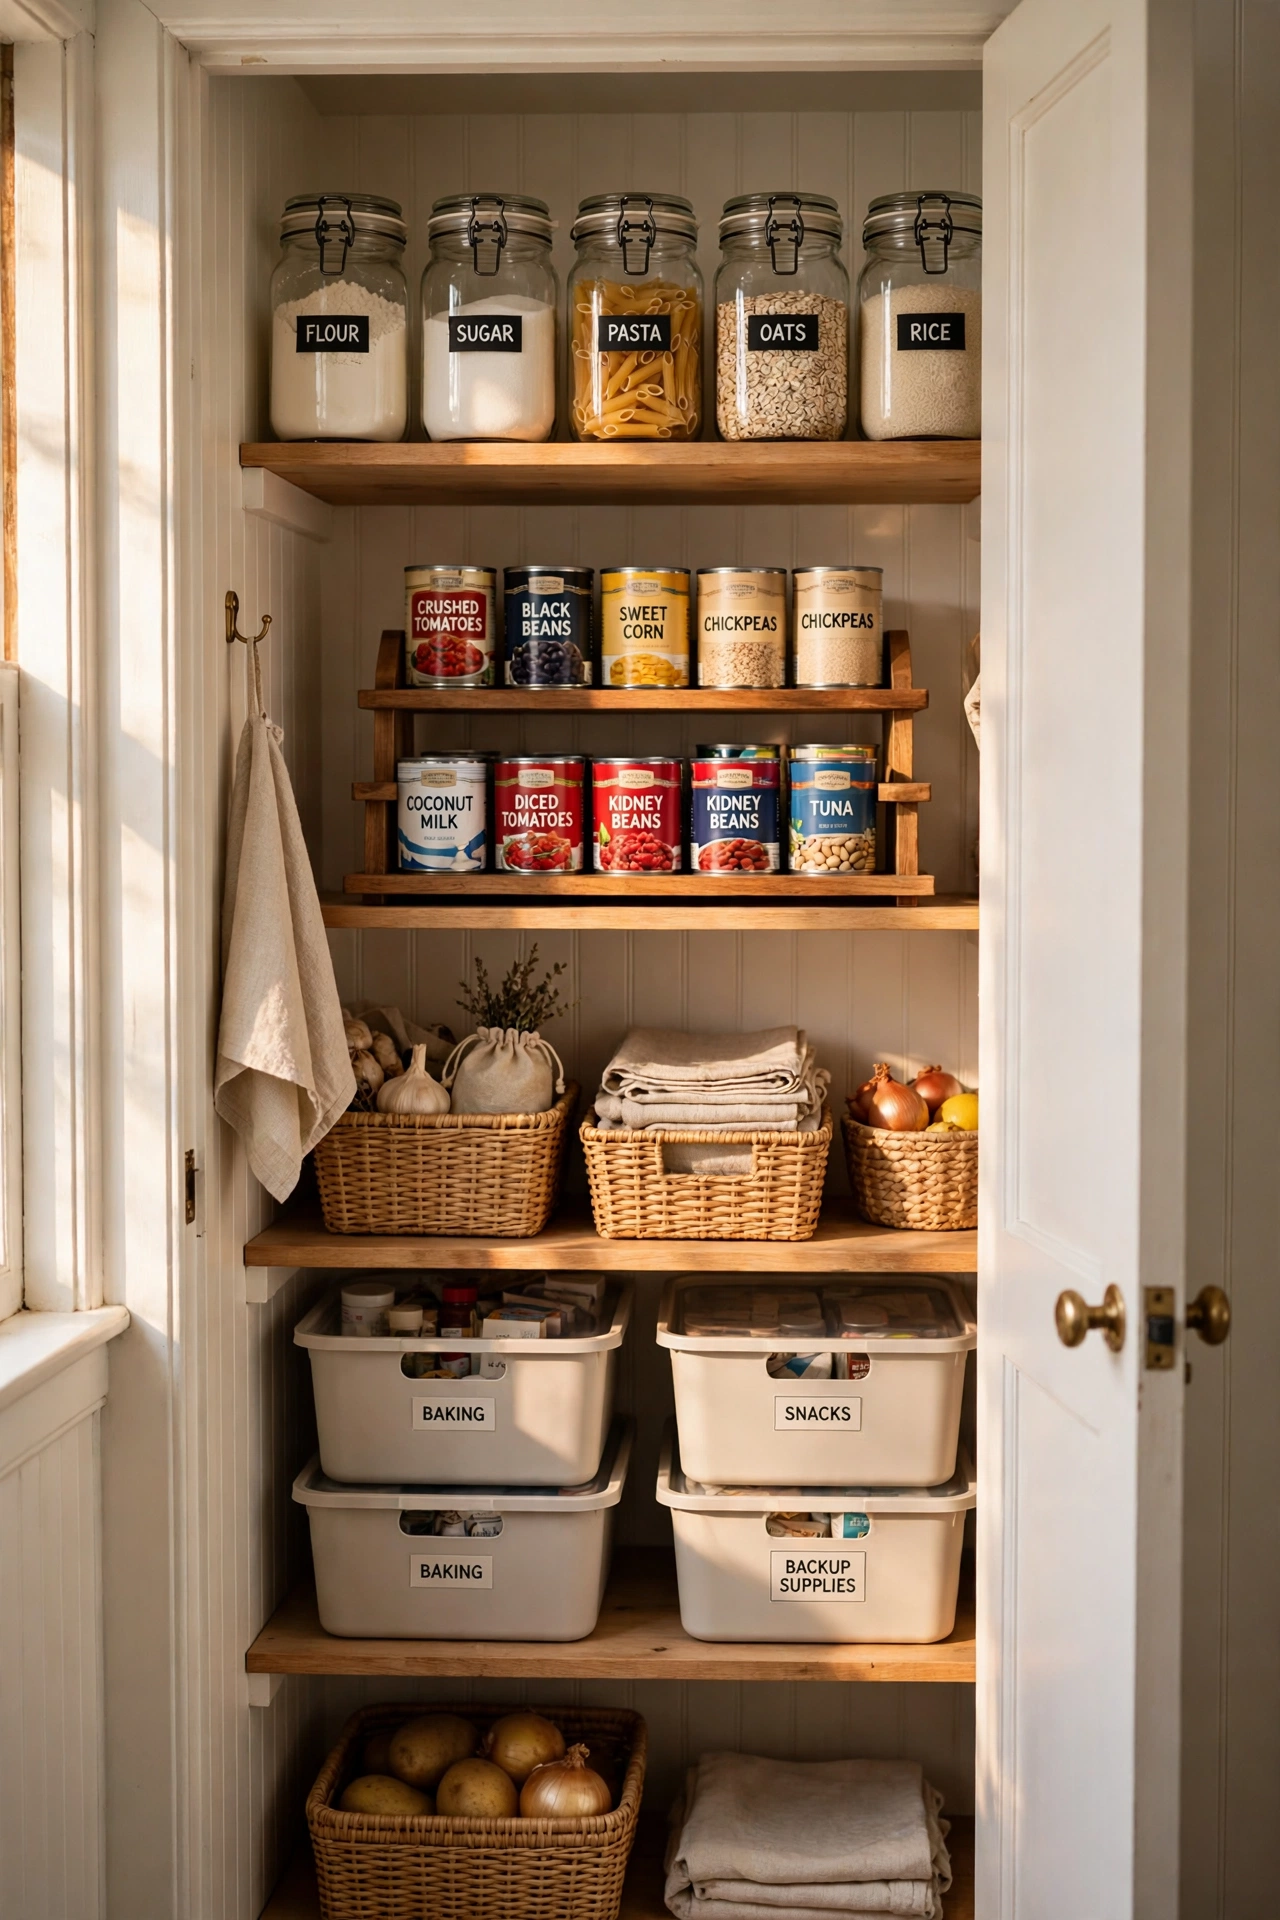
15 Small Apartment Pantry Organization Ideas That Actually Save Your Sanity
My pantry is roughly the size of a shoebox standing upright. I know this because for the first six months I lived here, opening it felt exactly like a shoebox — dark, packed, and full of things I couldn’t identify without pulling everything out. Pasta on top of oatmeal on top of a can of tomatoes I bought in a fit of optimism two years ago. Here’s what nobody tells you: pantry chaos isn’t a storage problem, it’s a visibility problem. You don’t need more space. You need to actually see what you own. These 15 small apartment pantry organization ideas are the ones that finally tamed mine — no renovation, no drilling, no spending a fortune.
1. Empty it completely and sort by “do I actually eat this”
Before you buy a single bin, take everything out. All of it. Then make three piles: stuff you eat weekly, stuff you eat occasionally, and stuff you’re keeping out of guilt (looking at you, quinoa from 2023). Toss the expired stuff. The guilt pile gets eaten this week or donated. Starting from a real inventory cuts the chaos in half before you spend a single rupee.
2. Create zones, not just shelves
The biggest mistake I made: organizing by container size instead of by function. Now my pantry has zones — breakfast stuff together, cooking staples together, snacks together, baking together. One zone per shelf, roughly. When I’m half-asleep making tea, I don’t hunt. I reach.
3. Use the inside of the door (it’s free real estate)
Cabinet-style pantry doors can hold slim racks or clear over-the-door organizers — spice packets, sauces, tea boxes. Mine holds all my spices on the door, which freed up an entire shelf. Just check your door closes fully before loading it up; I learned that one the hard way when the whole rack dumped soy sauce onto my cereal.
4. Tiered shelf risers are the cheapest miracle buy
If your shelves are deep, you lose everything in the back. A $10 stepped riser means every row is visible — nothing hides. I put risers on two shelves and it genuinely changed my mornings. No more buying a third jar of cumin because the first two were hiding.
5. Decant only what you actually use daily
Full decanting — pouring everything into matching jars — is beautiful and, honestly, a trap. It’s expensive and it wastes time if you’re just going to stare at it. I decant flour, rice, and sugar (the stuff I reach for every single day) and leave everything else in its original packaging. Selective decanting gives you 80% of the calm for 20% of the cost.
6. Lazy Susans for the deep corners
Deep corner shelves are where condiments go to die. A turntable on the back shelf means nothing gets lost behind the mustard. I have one for sauces and one for vitamins. They’re cheap, they need zero installation, and they make you feel weirdly powerful spinning them.
7. Stackable bins turn one shelf into two floors
Short cans and packets waste vertical space. Clear stackable bins let you build a second ‘floor’ on a shelf — snacks on top, dinner ingredients below. Clear matters: if you can’t see inside, you’ll forget what’s there. This is the same build-upward logic that worked when I maxed out my kitchen’s storage on a budget.
8. Label everything, even the obvious stuff
I thought labels were for people with too much time. Then I labeled my bins and realized my family finally puts things back in the right place. A cheap label maker or even masking tape and a marker works. Future-you, unloading groceries at midnight, will be grateful.
9. Store by frequency, not category — the front row is prime real estate
The most reachable shelf level is where your daily items live: coffee, tea, cereal, the olive oil you use every night. The stuff you touch once a month goes high or low. This sounds obvious, but most of us organize by type and then stretch for the cooking oil every single day. Put frequency first.
10. Magnetic strips on the side wall for spice tins
If your pantry has a metal side panel (or you stick a magnetic board inside), small magnetic spice tins snap right on. It looks fantastic, costs almost nothing, and saves a whole shelf. It’s also fully apartment-friendly with no holes needed.
11. Baskets that pull out like drawers
Deep shelves become black holes unless you can pull things toward you. Handle-baskets on deep shelves act like drawers — grab the handle, slide it out, see everything. I use two for baking supplies and one for the ‘random packets’ that otherwise float around like lost souls.
12. Corral the small stuff in one “command center” bin
Sauce packets, seasoning sachets, vitamins, that drawer of mystery items — give them one bin, not seven loose spots. Call it the command center. When it overflows, that’s your signal to sort, not your signal to buy another bin.
13. Hang measuring cups and small tools on the door
Command hooks on the inside of the pantry door hold measuring cups, scissors, bag clips, and the tape for labeling. These little things migrate to random drawers otherwise. My kitchen organization finally clicked when I stopped letting small tools roam free across five different drawers.
14. Use the gap between shelves (clip-on under-shelf baskets)
Under-shelf hanging baskets slide onto existing shelves and create bonus storage for flat items — wraps, liners, sandwich bags. It’s genuinely free space you already own. Most small kitchens have two or three of these hidden gaps; mine had three and I only noticed one until I measured.
15. Do a 10-minute weekly reset (the whole system depends on it)
Honestly? Even the best system dies without maintenance. Every Sunday I spend ten minutes: toss expired stuff, push items to the front, wipe one shelf. Ten minutes. That’s what separates a Pinterest pantry from a pantry that works on a Tuesday. No amount of clever storage survives neglect.
Quick Answers
What’s the cheapest way to organize a small apartment pantry?
Start with a full clear-out and zones — that’s free. Then add a tiered riser and a couple of clear stackable bins. Under $25 total, and it handles 80% of the problem.
Should I decant everything into matching jars?
No — decant only the 3–4 staples you use daily (flour, rice, sugar). Full decanting is expensive and honestly hard to maintain. Keep everything else in original packaging with labels.
How do I organize a pantry that’s very deep?
Use tiered risers so back rows are visible, lazy Susans for corner/back areas, and pull-out handle baskets so nothing gets stranded at the back.
What about pantry doors — how do I use them?
Over-the-door racks, command hooks for small tools, and magnetic strips for spice tins. The door is usually your biggest unused surface, and it’s all renter-friendly.
The Bottom Line
My shoebox pantry will never be a walk-in, and that’s fine. It works now — I can see everything, find everything, and I stopped buying duplicate cumin. That’s the whole bar: a pantry that works on a Tuesday morning, not one that photographs well. Start with the clear-out, add zones, then layer in the cheap tricks. Future-you will thank present-you every single morning.